MS Visual Studio#
Prerequisites#
It is assumed that Microsoft Visual Studio Professional (at least the Microsoft Visual C++ component) is installed. Although Microsoft Visual C++ 2008 should be sufficient, this how-to assumes that Microsoft Visual C++ 2010 is used. Furthermore, one should be familiar with the basics of Visual Studio, i.e., how to create a new project, how to edit source code, how to compile and build an application.
Note for KU Leuven and UHasselt users: Microsoft Visual Studio is covered by the campus license for Microsoft products of both KU Leuven and Hasselt University. Hence staff and students can download and use the software.
Also note that although Microsoft offers a free evaluation version of its development tools, i.e., Visual Studio Express, this version does not support parallel programming.
OpenMP#
Microsoft Visual C++ offers support for developing openMP C/C++ programs out of the box. However, as of this writing, support is still limited to the ancient OpenMP 2.0 standard. The project type best suited is a Windows Console Application. It is best to switch ‘Precompiled headers’ off.
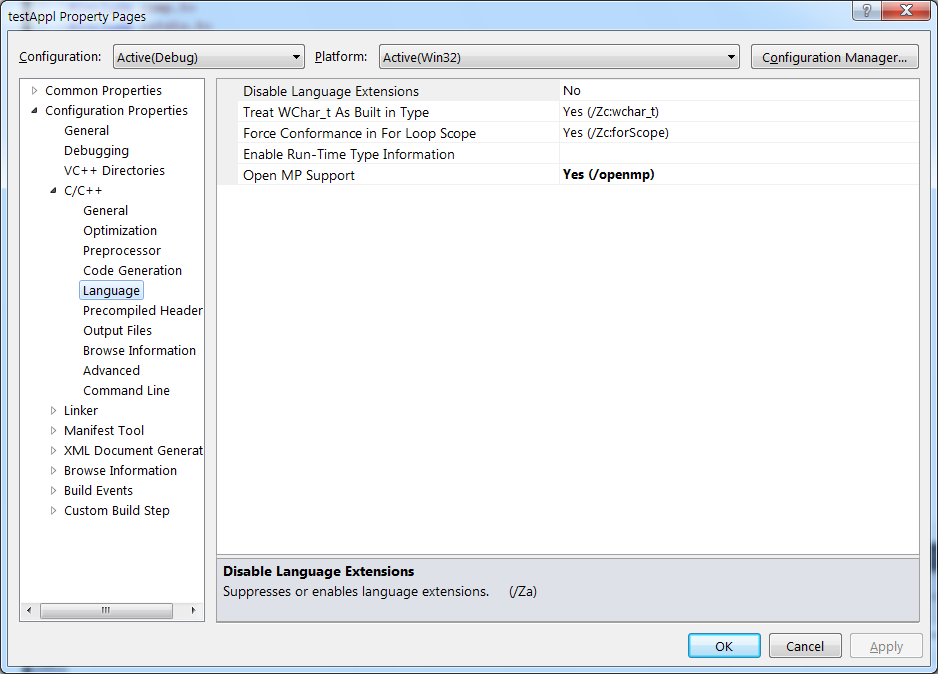
Once the project is created, simply write the code, and enable the openMP compiler option in the project’s properties as shown below.
Compiling, building and running your program can now be done in the familiar way.
MPI#
In order to develop C/C++ programs that use MPI, a few extra things have to be installed, so this will be covered first.
Installation#
The MPI libraries and infrastructure is part of Microsoft’s HPC Pack SDK. Download the either the 32- or 64-bit version, whichever is appropriate for your desktop system (most probably the 32-bit version, denoted by ‘x86’). Installing is merely a matter of double-clicking the downloaded installer.
Although not strictly required, it is strongly recommended to install the MPI Project Template as well. Again, one simply downloads and double-clicks the installer.
Development#
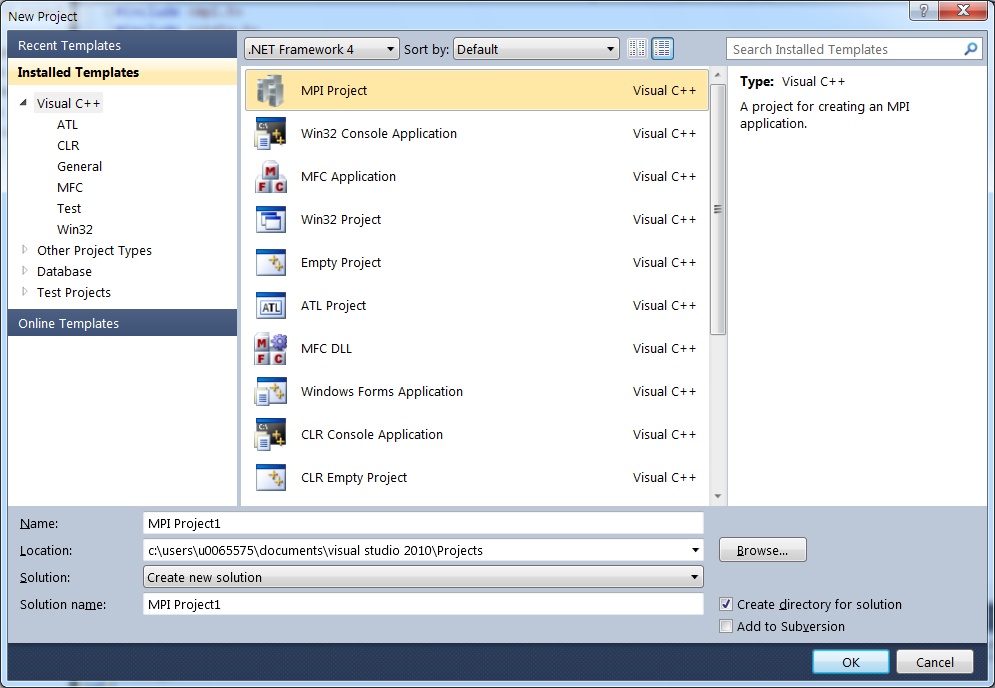
To develop an MPI-based application, create an MPI project.
It is advisable not to use precompiled headers, so switch this setting off.
Next, write your code. Once you are ready to debug or run your code, make the following adjustments to the project’s properties in the ‘Debugging’ section.
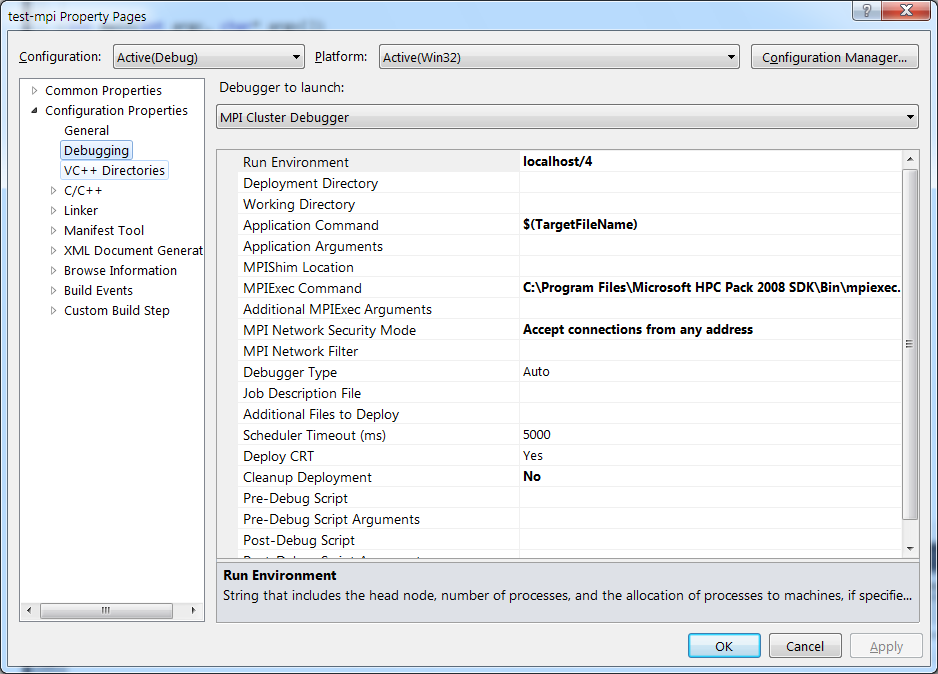
A few settings should be verified, and if necessary, modified:
Make sure that the ‘Debugger to lauch’ is indeed the ‘MPI Cluster Debugger’.
The ‘Run environment’ is ‘localhost/1’ by default. Since this implies that only one MPI process will be started, it is not very exciting, so change it to, e.g., ‘localhost/4’ in order to have some parallel processes (4 in this example). Don not make this number too large, since the code will execute on your desktop machine.
The ‘MPIExec Command’ should be pointed to ‘mpiexec’ that is found in the ‘Bin’ directory of the HPC Pack 2008 SDK installation directory.
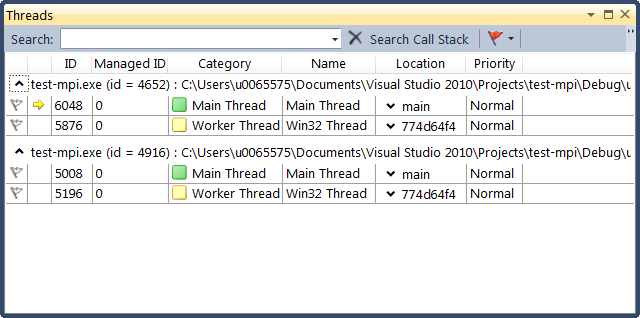
Debugging now proceeds as usual. One can switch between processes by selecting the main thread of the appropriate process by selecting the appropriate main thread in the Threads view.
Useful links#
A tutorial on debugging in Microsoft Visual C++